Showing posts with label Teen bedroom. Show all posts
It's here! I have reached the 6 week mark of the One Room Challenge. The challenge was to transform a room in 6 weeks, and here it is. Thank you so much Linda for opening up this fun challenge (aka kick in my rear) to all bloggers in your link up party.
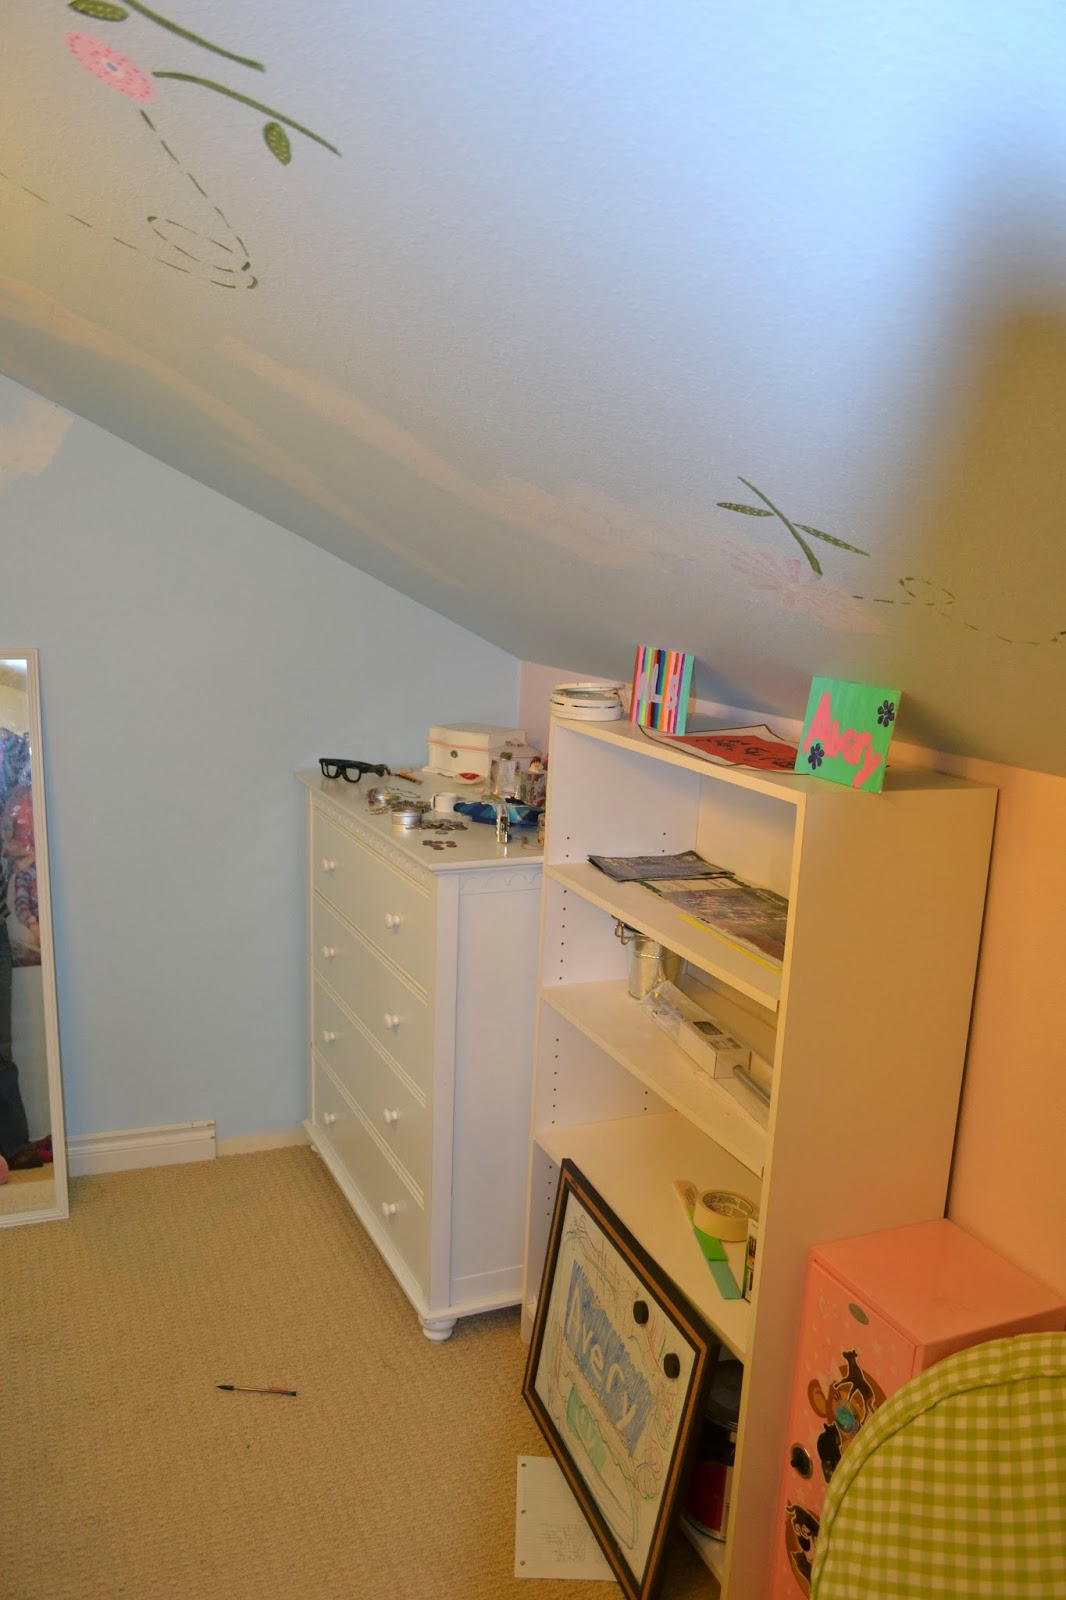
Let's take a little stroll down memory lane for a bit, shall we? This is what the room looked like before.
This little space is connected to my 12 year old daughter's room. It was sort of in this transitional mode, since her older sister just moved out of their shared bedroom into her own bedroom. It needed a little updating from little kid space to the fun "eye rolling... I know!" age that she has now entered.
Actually, she is quite a good kid. I shouldn't paint such a bad picture of her. Guess we all go through those fun years, right?


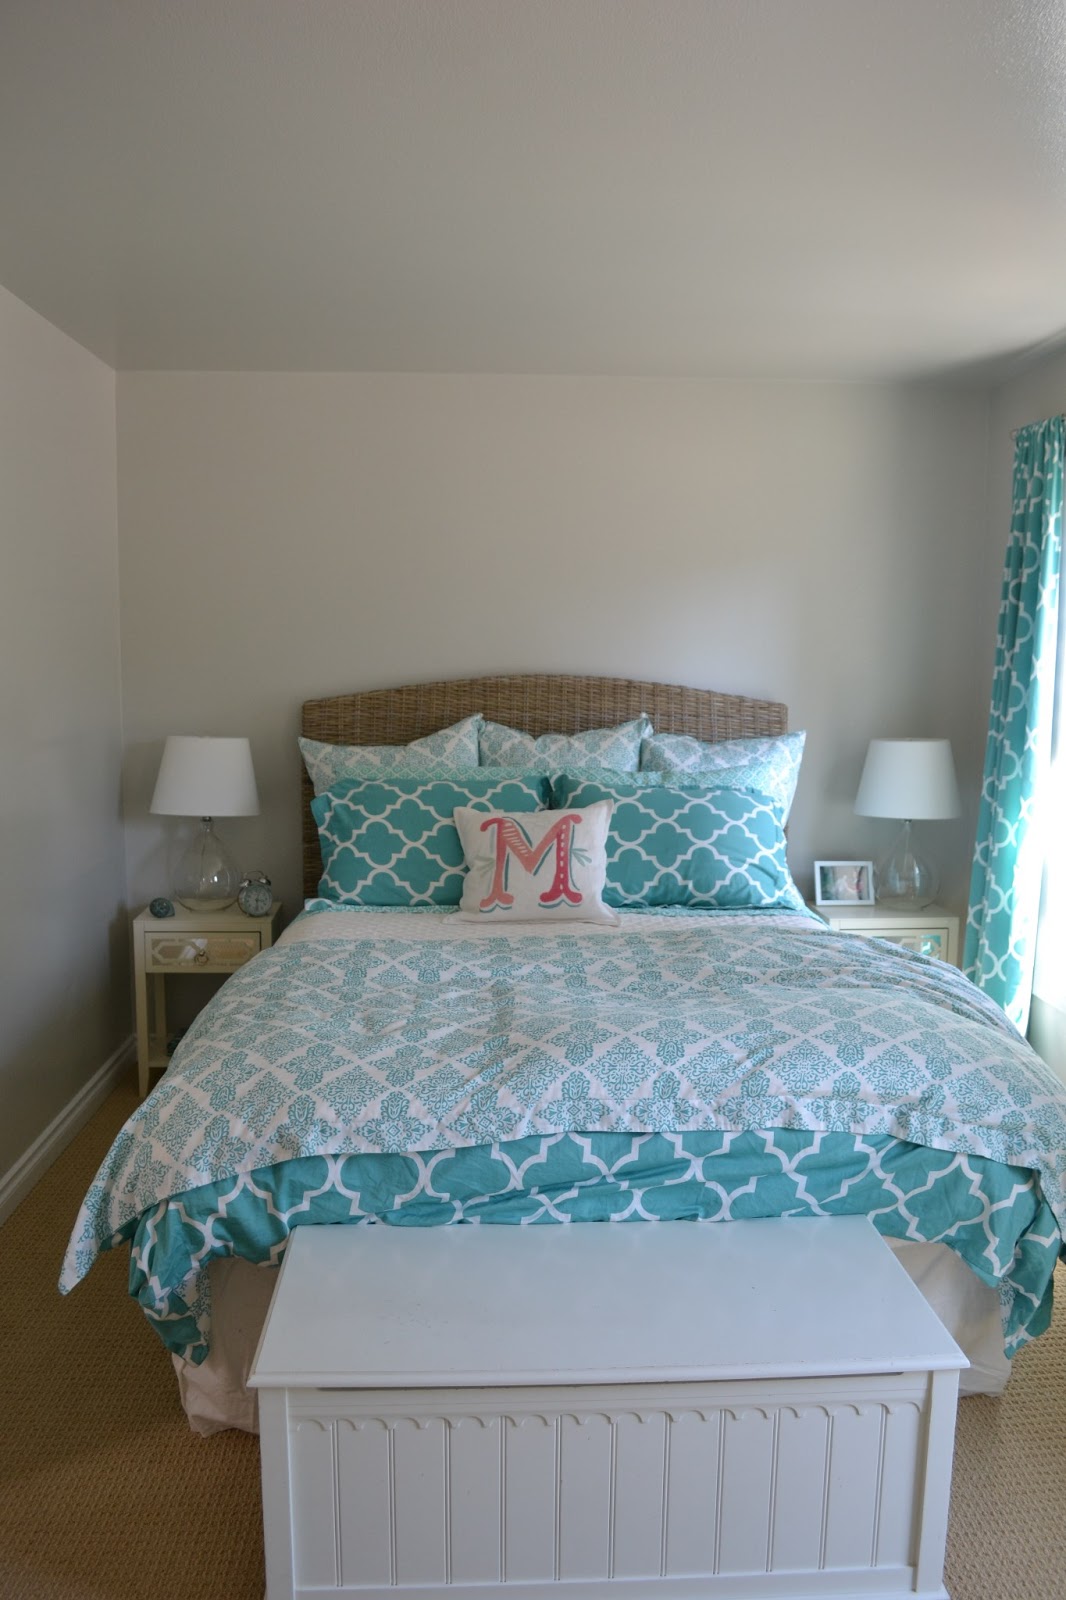
And BAM! just like that it is transformed!


So there it is. I have a few minor tweaking to do. If you have eagle eyes, you may have noticed some of the moldings are missing, and I need to repaint the door molding. If you didn't see those things, please disregard.
Also, I ordered this fun tassel garland to put on her chalkboard wall. Unfortunately it has not arrived yet, but I will post photos of it once it's here.


I am pretty happy with the way things turned out in this space and I think my daughter is pretty happy as well. Fun times should be had in this space with her friends and maybe she'll let her sister in once in awhile. Heck, I might go in there and hide from time to time.

Please go visit our lovely hostess Linda's blog, Calling it Home. You will be able to see the MANY other bloggers that linked up to this fun challenge as well. So many good projects and spaces were transformed, I was shocked and excited to follow them all during these past 6 weeks.

And guess what? Linda is hosting another round in April. I have just the room I want to tackle too!
Shh... don't tell my husband. If you have a blog and didn't link up this time, you will have your chance this spring!

Thank you all who visited my blog during these weeks, and those that left encouraging words. It was so nice and SO appreciated. Thank you, thank you!!!
Woops, so I was supposed to be posting this yesterday but this week sort of got the best of me.
I would like to say that I have a lot of things to tell you about that I accomplished since last week, but sadly that would be a lie. Dang, how long can redoing a simple tiny room take? Hopefully, no longer than 6 weeks! haha

So, anyway...I will make this post short and sweet. Here is where I am today.


I started painting a plain white cheap mirror from Target green.


I finished the chalkboard wall and have started the first level of the ombre wall.

Still on the search of possible new wall scone lighting for this room, and I am looking for one of these...


I have seem these online at Pottery Barn, Serena and Lily and many other sites, but they are all close to $100. That's not a price I will good about spending on a laundry basket for a 12 year olds' room.
I did see some at Homegoods, a few months ago and am kicking myself for not getting one.
If you know of anywhere else I should search, please let me know.

Thanks and I will hope to show you more progress next week. Have a great weekend!

Missed out on the first two weeks? Here's week one and week two. Or want to see what other bloggers that are linking up are doing? See here
So I will be perfectly honest with you, I am (if you don't know already) not a crafty person, or a true diy gal. I'd like to be but #1, I'm a little afraid of power tools (need to work on that), #2, I'm a bit lazy and would rather just buy it than make it, and #3, did I mention I might be a tad lazy?

However, one thing we definitely do around our home is paint ourselves. I sort of like it other than the prep work and the clean up afterwards. Other than that, I like it. Haha. Again, did I mention the laziness?

We try to be very detail oriented while painting though. There's nothing like spending all that time prepping and moving furniture, painting, and having it look like a 6 year old slopped some paint on the wall. We try to do our very best with the cut in work around the moldings and trim work, and if we are doing the ceiling and walls a different color, we do our best to make that as straight of a line as we can.

Our old trick was to put tape on the ceiling close to the intersection of the wall as possible, and first paint the color of the ceiling to seal in the tape. Once that was dry, we would paint over with the wall color. Pull it off and voila, a straight line. Well, most of the time. But we have textured walls, and sometimes it doesn't come off quite as straight as I'd like.

Recently, we've been working on daughter #3's room, ( #3 for birth order, not for how well she is favored) We painted her ceiling a fun turquoise color and painted the walls white. I wanted to do something fun, so decided to put a green stripe at the top of the wall, where crown molding would go.

I was researching how to paint a stripe, since I've never done any and I found a "new to me" trick that I was intrigued to test out.

(note, do not put caulk where it shows in this picture. I couldn't keep my hand placed right on line while taking picture in the other hand.)
 
 So, first step is to tape the ceiling right up to the edge of the wall.
Then for your stripe or stripes; decide how big you want the stripe and then take a measuring tape and make pencil marks every 12 inches or so along the length of your wall. Then take your tape and tape along those marks. You might want to take a leveler to make sure you made your tape line straight.
Then once it's all taped up, take white paintable caulk and very lightly put in on the edge of the tape lines and take your finger and thin it out along the line. This is to seal the tape really well, and gets in the grooves of your textured wall.


Then you are good to go on painting your stripe(s). I let my paint dry but after re-reading/watching some other tutorials, you don't need to wait for paint to dry and can pull it right off.


I was very happy with this new trick and will definitely use it again.  Have you used this trick before?
There are many youtube videos out there if you need a more visual tutorial.

The room is getting closer to be done. Need curtains, curtain rods, art, reupholster her desk chair, and maybe a rug. Again, other than that it's almost done. Whew! Better get my butt moving.
Hope to share the end results soon!
**Disclaimer** I know I don't paint the best picture of myself (no pun intended) about myself being lazy. If anyone ever wanted me to help them in their own home (which is my goal someday), I would not be lazy for anyone else. It's just in my own home projects that things tend to get pushed aside, and prolonged longer than they should. Anyway, just wanted to be sure you all knew I have "selective" laziness, and should be seeking help for it soon. Hopefully, I'm not the only one out there that has that disease.
Go over to Emily's blog today to see some great links of kids' spaces and for a great PB kids giveaway


I will be posting my links of my daughter's room and the girls' shared bathroom.


If you are looking for inspiration for some kids' spaces, definitely hop over to her site and if you enter in the giveaway... good luck!
While my daughter #2 is away on an exciting trip to China, I have been able to get into her room, clean, organize, and add a few touches. Guess it takes a child to leave the country to get stuff done huh?

Since this will only stay clean for a little while, until she returns, I thought I'd finally get around to taking photos of her room for posterity.

We have three daughters, and live in a three bedroom home. The two youngest daughters  (now 14 and 12) shared a very large room from the birth of the youngest until about a year and a half ago, when our oldest who is now 22 moved out on her own. {gulp}

When she moved out, I thought there would be bickering between the younger two on who would have the large room all to themselves but surprisingly my middle daughter wanted the smaller room. Okay....

So, we redid the room for her and it is now complete.... I think.

Of course, this is not entirely the way I would like to have decorated the room, but this child has very specific wants, and it is her room after all. When I walk into this room, I do feel very calm (except for when there are clothes scattered all over and homework, books, papers littering the floor). It has a very tranquil feeling and for this child, it is exactly what she needs!


Pretty simple and that's the way she likes it. I adore the colors, but wished she had let me have chosen different drapes and added more to the walls or add in more colors. I'd also like to add a big area rug under her bed to add another color and pattern, and I'd even like to switch out her shades on her lamps. Hopefully some crown molding will be added as well. Maybe in time she'll let me play around a little more with her room.
 
Other than the occasional tornado that she creates in her room ( like most teenagers), she doesn't like a whole lot of knick-knack type stuff. As I helped her do this room, I found out that she gets overwhelmed with too many things in her room, so we kept it very simple. And for this small space of a bedroom, we couldn't really add too much else anyways.
 
Where is her dresser, you may be wondering... it just happened to be the perfect size to slip into her closet. The only dilemma we had with that was where to put her shoes?  The toy box  chest at the foot of her bed is now where her shoes are thrown into and has worked out great. I am actually hoping to have a cushion custom made to put on top of the chest.
 
Little details about her room:
Paint color: Gray Owl by Benjamin Moore
Headboard: Pier One
Duvet cover, shams and drapes: Zgallerie
Sheets: PB Teen
Throw pillows: PB Teen
Desk: Best Buy (online) rather cheap one though, if done over I would of stepped up and paid for a higher end one.
Chair and slipcover: Pottery Barn
Nightstands and lamps: Target
Toy box/chest: Crate and Barrel
She added shells from one of our trips to Hawaii, and the photo on the wall was a photo we took on our most recent trip to the Big Island. The London pillow was a nod to one of her favorite boy bands, One Direction and also singer, Ed Sheeran.
 
Anyway, that's the scoop on her room. Next up will be the room of daughter #3 and revamping it now that she's got the BIG O' Room to herself. Hopefully, I will have photos before too long.


As I am just wrapping up a room makeover for my almost 14 year old daughter (yikes! how did that happen?), and I am gathering things to soon do a makeover for my almost 12 year old daughter (double yikes!), I have been scouting lots of different teen/tween stuff.
I found a few fun new items on Pottery Barn Teen and I thought I'd share them with you.


I just LOVE the colors on this chevron duvet cover! It's so spring like and fun!! And aren't those lights amazing?? Like little disco lights.
 This is a very fun headboard. If we were buying one for any of the girls, this would definitely be in the running.
I thought this was a fun and different one too. I really like the nail head trim. It also comes in pink and teal.


 These pillows are super cute as well. Too bad I already purchased our pillows.


And this chandelier! OMG. LOVE IT!
These chairs are so great and ironically I have the exact chair in my garage waiting for a makeover for the 12 year old's room. So excited to see what it will look like after I'm done with it.

Anyway, I will share my almost 14 year old's room with you one of these days. I am just waiting for a clear, sunny day and when the room is clean. Yeah, I know for both of those things to happen on the same day around here are pretty slim! Keeping fingers crossed it'll be soon.
To see my mood board inspirations for both girls, go here and here.

So, what's your favorite new item from PB Teen?